이클립스 이스케이프 문자열 복사

이클립스에서 문자열 복붙 할 때 \n \t 등 이스케이프 문자열을 복붙하면 \n \t 따위로 복붙 되는 귀찮은 일이 발생한다.
이럴때는 Window -> Preferences -> Java -> Editor -> Typing 에서
Escape text when pasting into a string literal 설정을 해제 해 주면 된다.


728x90
반응형

'IDE' 카테고리의 다른 글

[Eclipse] 최적화 설정하기  (0) 2020.01.26
[Eclipse] eclipse.ini 파일 설정  (0) 2020.01.26
[Eclipse] 인코딩 설정  (0) 2020.01.26
[Eclipse] Code Style Formatter, Text Editor 설정하기  (0) 2020.01.26
[Eclipse] 테마 변경 (Windows)  (0) 2020.01.26

Eclipse 최적화 설정

  1. eclipse.ini 파일 설정.
     

    [Eclipse] eclipse.ini 파일 설정

    eclipse.ini 주요 설정 값 Eclipse 실행시 eclipse.ini 파일에 설정된 옵션으로 실행됨. 이 설정 파일은 windows 에서는 eclipse.exe 파일이 있는 설치 폴더에, MacOS 에서는 Eclipse.app > Contents > MacOS 폴더..

    jeaha.dev

  2. 인코딩 설정.
     

    [Eclipse] 인코딩 설정

    이클립스 인코딩을 UTF-8로 설정해 줘야 하는데, 설정해야 할 곳이 은근 많다. Windows > Preferences > General > Content Types > Java Class File > Default Encoding Windows > Preferences > General > Edit..

    jeaha.dev

  3. 메모리 사용 상태 표시.
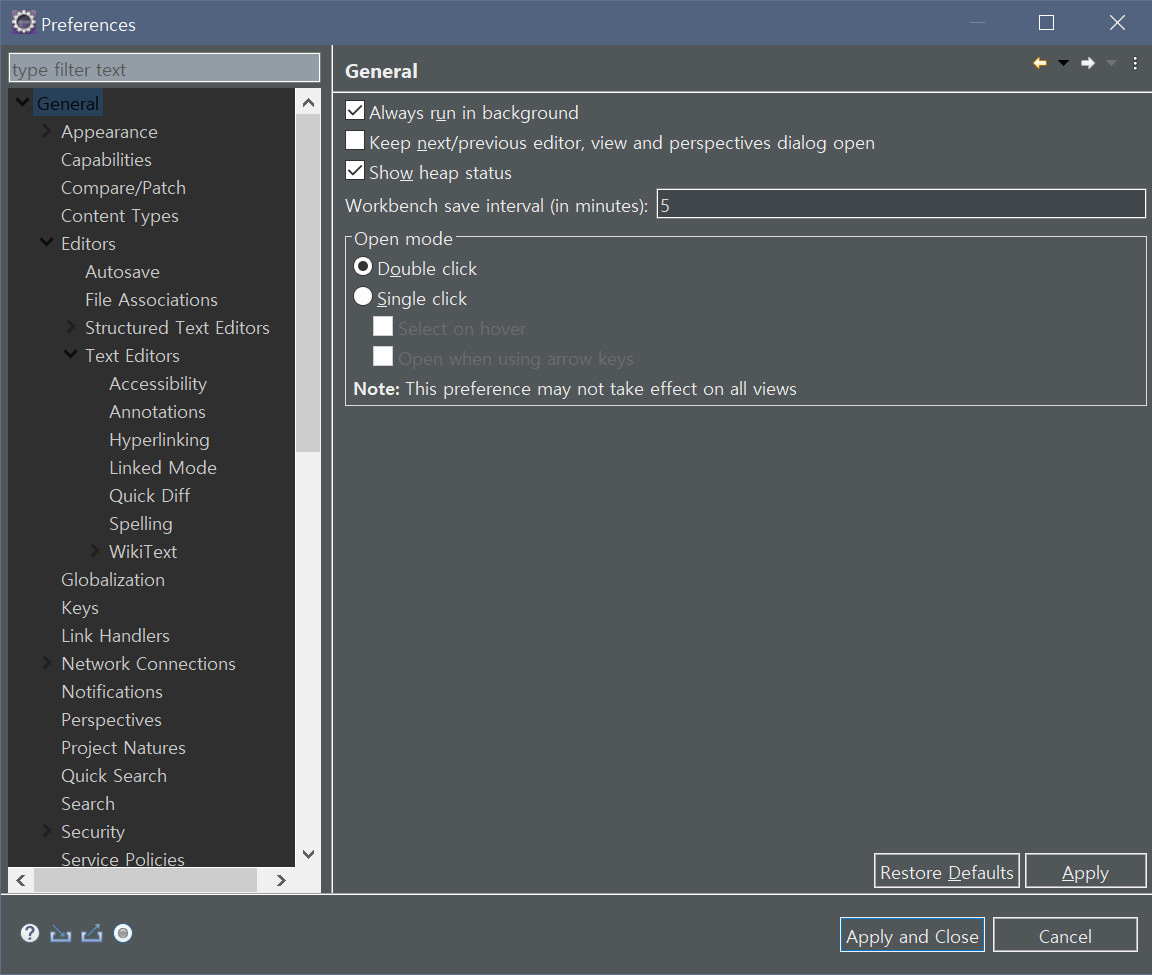
    • Windows > Preferences > General > Show Heap Status 체크.
  4. Spell Checking 해제.
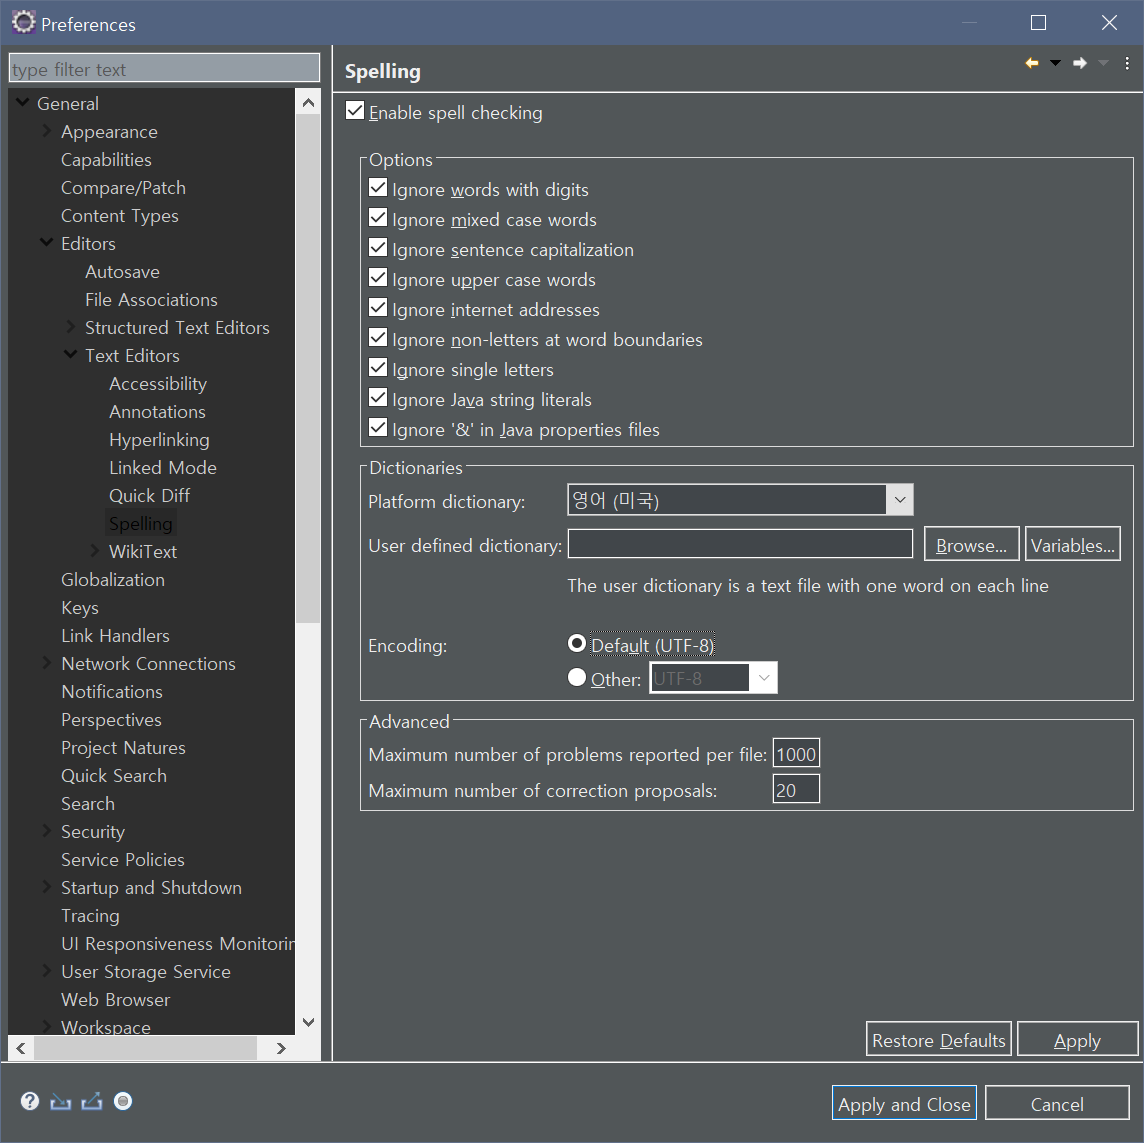
    • Windows > Preference > General > Editors> Text Editors > Spelling > Enable Spell Checking 체크 해제.
  5. 실행/종료 속도 개선.
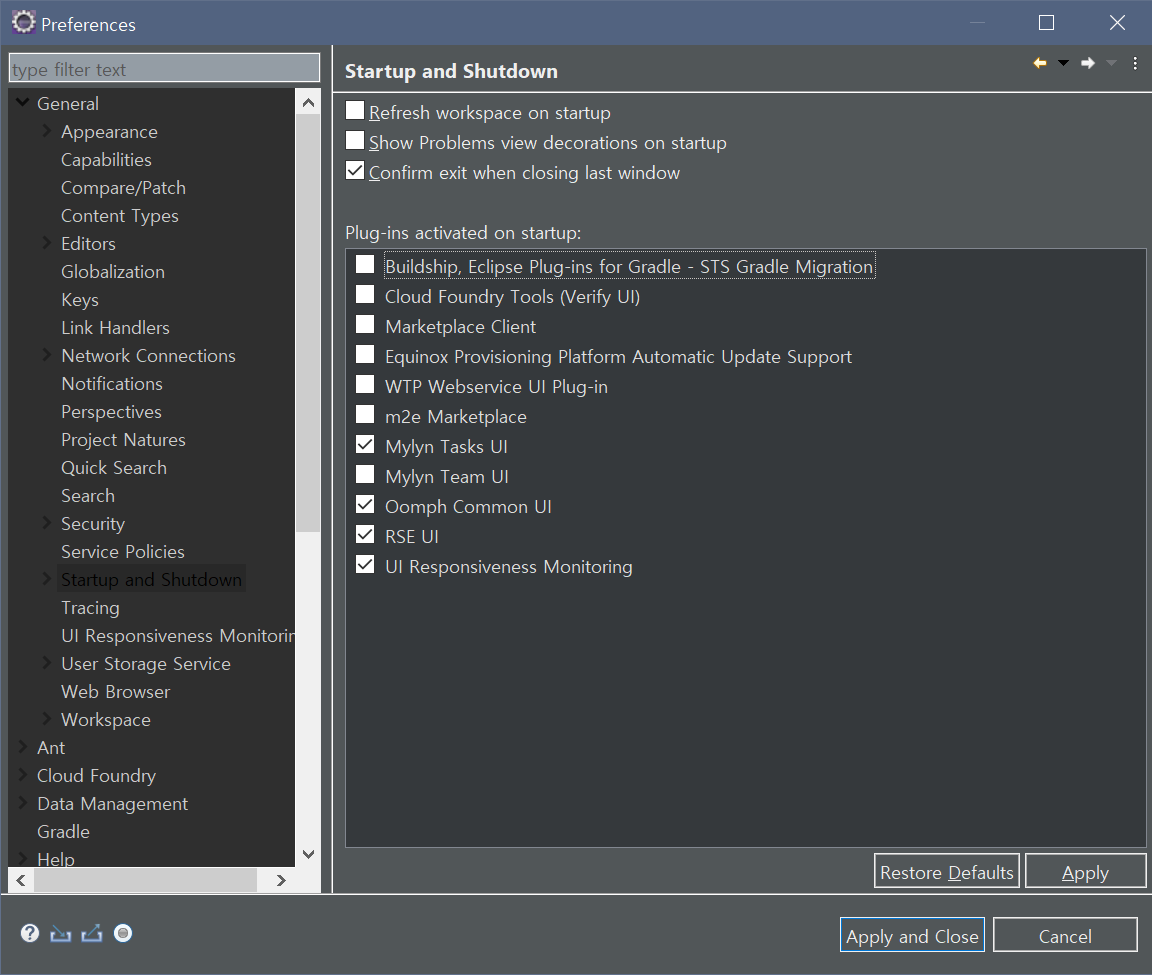
    • Windows > Preferences > General> Startup and Shutdown에서 디폴트 플러그인 중 불필요한 플러그인 체크 해제.
  6. 자동 업데이트 해제
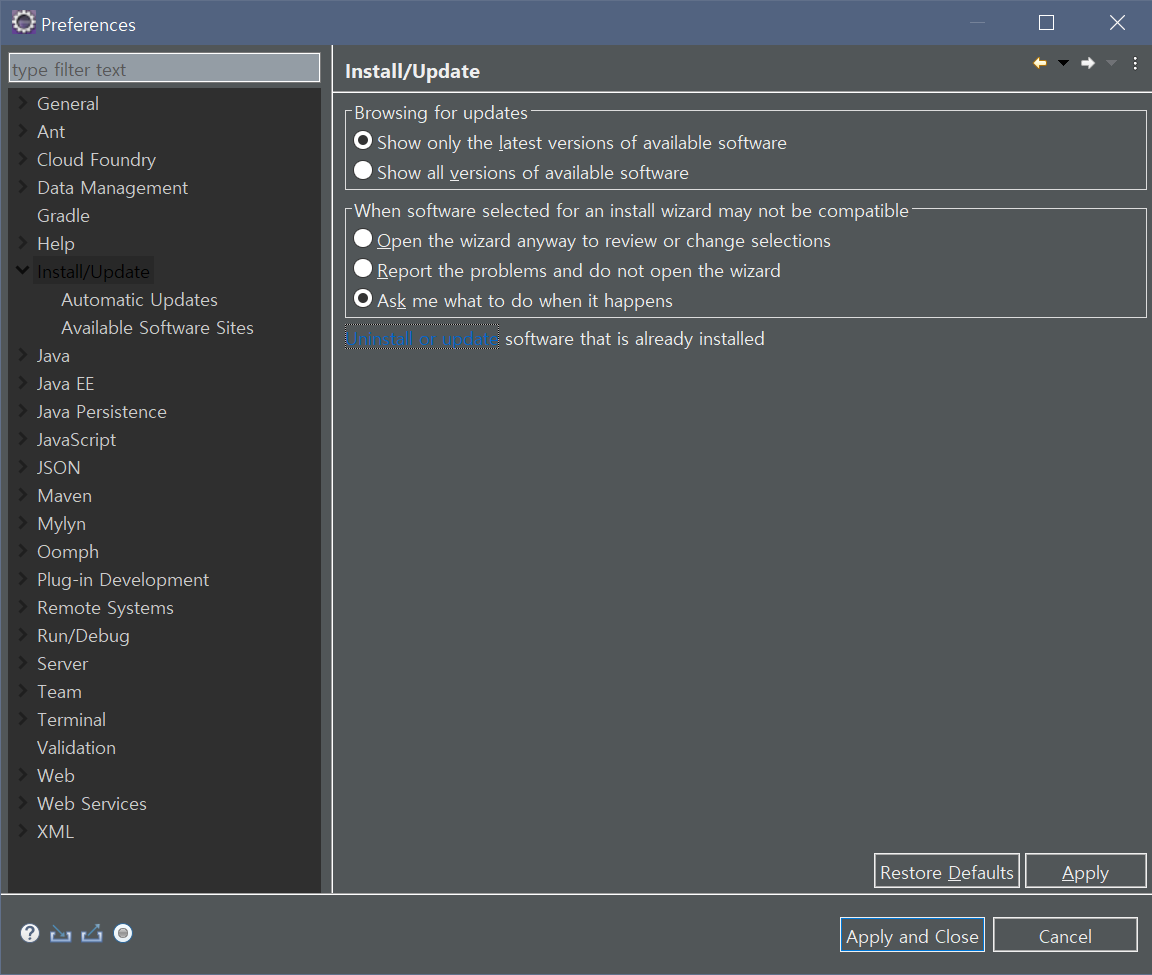
    • Windows > Preferences > Install/Updates > Automatic Updates 체크 해제.
  7. 불필요한 플러그인 삭제.
    • Windows > Preferences > Install/Update Uninstall or Update 창 열어서 불필요한 플러그인 삭제.
  8. 코드 자동완성 기능 해제.
    • Windows > Preferences > Java > Editor > Content Assist - Auto Activation - Enable Auto Activation 체크 해제.
    • Windows > Preferences > JavaScript > Editor > Content Assist - Auto Activation - Enable Auto Activation 체크 해제.
    • Windows > Preferences > HTML > Editor > Content Assist - Auto Activation - Enable Auto Activation 체크 해제.
    • Windows > Preferences > XML > Editor > Content Assist - Auto Activation - Enable Auto Activation 체크 해제.
  9. JSP 유효성 체크 해제.
    • Windows > Preferences > Web > JSP Files > Validation > Validate JSP Fragments 체크 해제.
  10. 자동 빌드 기능 해제.
    • Windows > Preferences > General > Workspace > Build Automatically 체크 해제.
    • BUT 이 설정은 Spring Project를 진행할 때 없으면 귀찮아 지므로 해제하지 않는다.


728x90
반응형

eclipse.ini 주요 설정 값

Eclipse 실행시 eclipse.ini 파일에 설정된 옵션으로 실행됨.
이 설정 파일은 windows 에서는 eclipse.exe 파일이 있는 설치 폴더에, MacOS 에서는 Eclipse.app > Contents > MacOS 폴더 안에 있다.
주요 설정 값들을 알아보자.

  • vm
    • jdk의 경로를 직접 지정. 보통은 신경 쓸 필요는 없으나 jdk를 여러개 설치하고 작업한다면 직접 위치를 지정하여 사용할 수 있음.
    • vmargs 라인 이전에 설정.
  • -Dosgi.requiredJavaVersion=1.8
    • 사용할 자바 버전.
  • -Xverify:none
    • 초기 실행시 클래스의 유효성 검사의 여부.
  • -XX:UseParallelOldGC
    • 병렬 GC 사용
  • -XX:+AggressiveOpts
    • 컴파일러의 소수점 최적화 기능 작동 설정.
  • -XX:-UseConcMarkSweepGC
    • 병행 Mark-Sweep GC를 수행하여 이클립스 GUI의 응답 최적화 설정.
  • -XX:PermSize=1024m
    • JVM 클래스와 메서드를 위한 공간.
    • OutOfMemoryError:PermGenspace 발생시 이 설정값을 늘려야 한다.
  • -XX:MaxPermSize=1024m
    • 최대값은 8번의 최소값 이상이여야 함.
  • -XX:NewSize=256m
    • 새로 생성된 객체들을 위한 공간
  • -XX:MaxNewSize=256m
    • 상기 동일
  • Xms2048m
    • 최소 Heap 메모리 크기.
  • Xmx4096m
    • 이클립스가 사용하는 최대 Heap 메모리 크기, 보통 내장된 메모리의 4분의 1을 최대 Heap 메모리로 설정하여 사용.

항상 설정 파일을 수정할 땐 원본 백업을 해 두도록 하자.

eclipse.ini

-startup
plugins/org.eclipse.equinox.launcher_1.5.600.v20191014-2022.jar
--launcher.library
C:\..\.p2\pool\plugins\org.eclipse.equinox.launcher.win32.win32.x86_64_1.1.1100.v20190907-0426
-product
org.eclipse.epp.package.jee.product
-showsplash
C:\..\.p2\pool\plugins\org.eclipse.epp.package.common_4.14.0.20191212-1200
--launcher.defaultAction
openFile
--launcher.appendVmargs
-vm
C:/Program Files/Java/jdk1.8.0_241/bin
-vmargs
-Dosgi.requiredJavaVersion=1.8
-Dosgi.instance.area.default=@user.home/eclipse-workspace
-XX:+UseG1GC
-XX:+UseStringDeduplication
--add-modules=ALL-SYSTEM
-Dosgi.dataAreaRequiresExplicitInit=true
-Xverify:none
-XX:UseParallelOldGC
-XX:+AggressiveOpts
-XX:-UseConcMarkSweepGC 
-XX:MaxPermSize=1024m
-XX:MaxNewSize=1024m
-Xms2048m
-Xmx4096m
--add-modules=ALL-SYSTEM
-Declipse.p2.max.threads=10
-Doomph.update.url=http://download.eclipse.org/oomph/updates/milestone/latest
-Doomph.redirection.index.redirection=index:/->http://git.eclipse.org/c/oomph/org.eclipse.oomph.git/plain/setups/

WAS 메모리 설정

실행할 서버 > Open Launch Configuration > Arguments > VM arguments 설정

-XX:MaxPermSize=256M
-Xms1024m
-Xmx1024m
728x90
반응형

이클립스 인코딩을 UTF-8로 설정해 줘야 하는데, 설정해야 할 곳이 은근 많다.

  1. Windows > Preferences > General > Content Types > Java Class File > Default Encoding
  2. Windows > Preferences > General > Editors > Spelling > Encoding
  3. Windows > Preferences > General > Workspace > Text File Encoding
  4. Windows > Preferences > Web > (CSS, HTML, JSP) > Encoding
  5. Windows > Preferences > XML > XML Files > Encoding
728x90
반응형

Code Style Formatter와 Eclipse Text Editor 설정하기

이클립스 최초 설정이 편할 수도 있지만,
TAB 공백보다는 띄어쓰기 2칸을 쓰고,
띄어쓰기나 공백이 몇 개인지 볼수 있는게 Editor 설정 하는것이 더 편하다고 느껴짐.
워드나 문서작업 할때는 지저분해 보여서 싫었는데, 코딩할 땐 공백 문자가 보이는 것이 훨씬 보기 편하고 정리가 잘 되는거 같음.
그래서 Eclipse나 VS Code를 설치하면 제일 먼저 하는 설정중에 하나임.

CodeStyle 적용하기

Google/StyleGuide에서 첨부 파일을 받은 뒤 코드스타일을 적용 하겠음.

  1. 이클립스 상단의 Windows > Preferences로 들어감.
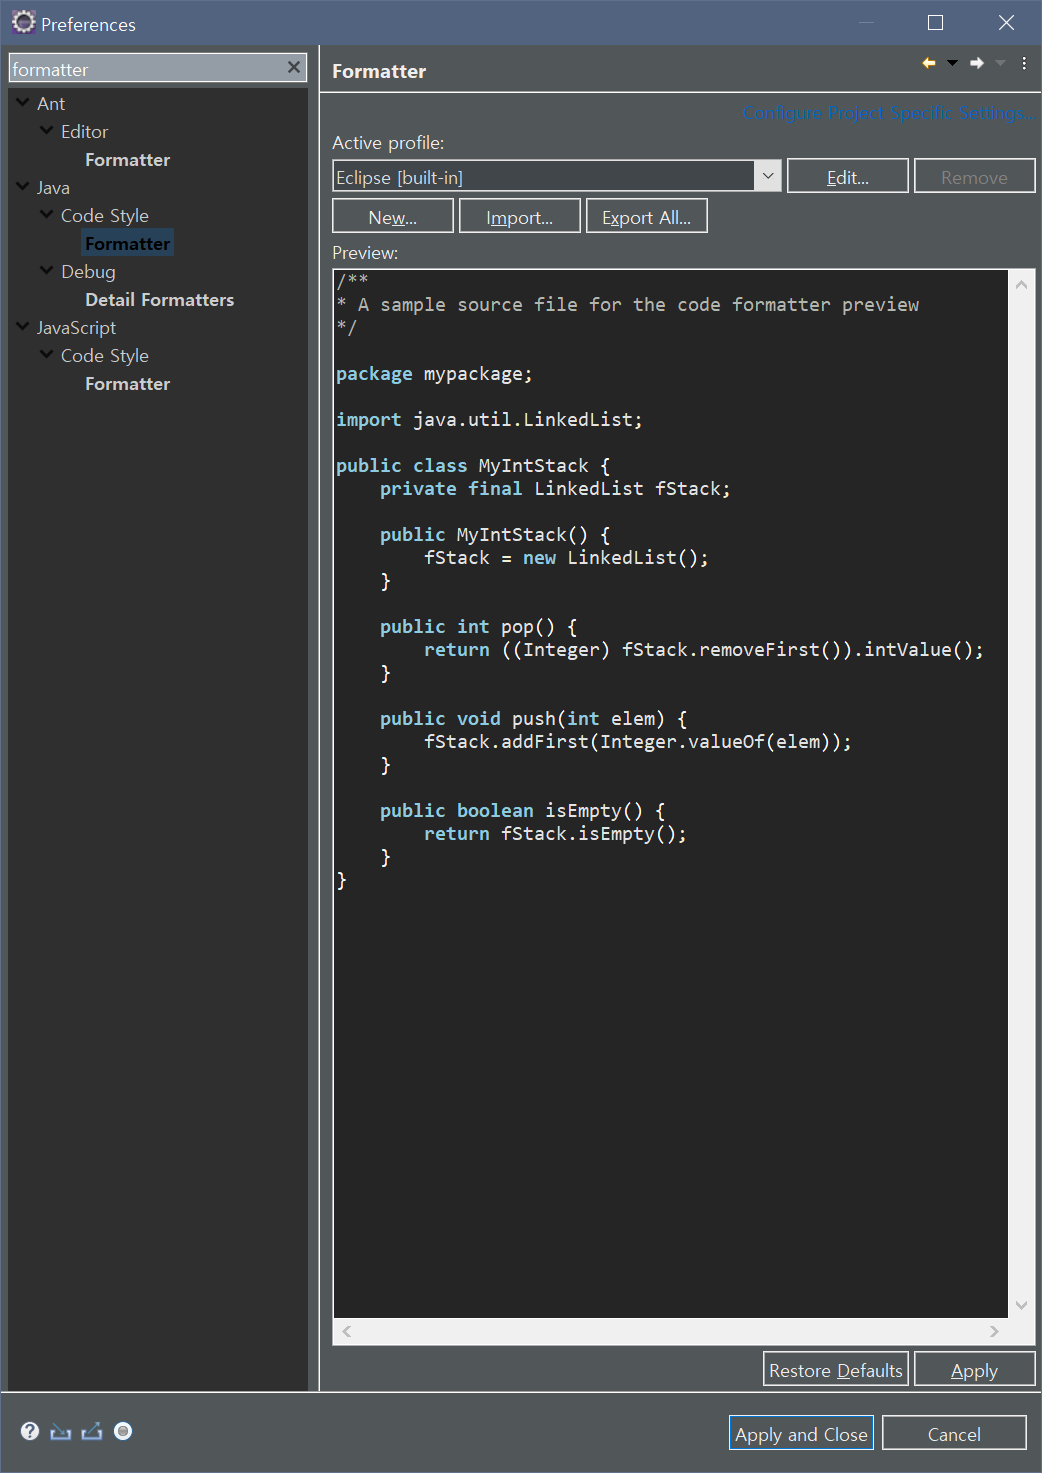
  2. 왼쪽 상단 검색창에서 Formatter 검색 Java > Code Style > Formatter로 들어감.
  3. Import > eclipse-java-google-style.xml 선택.
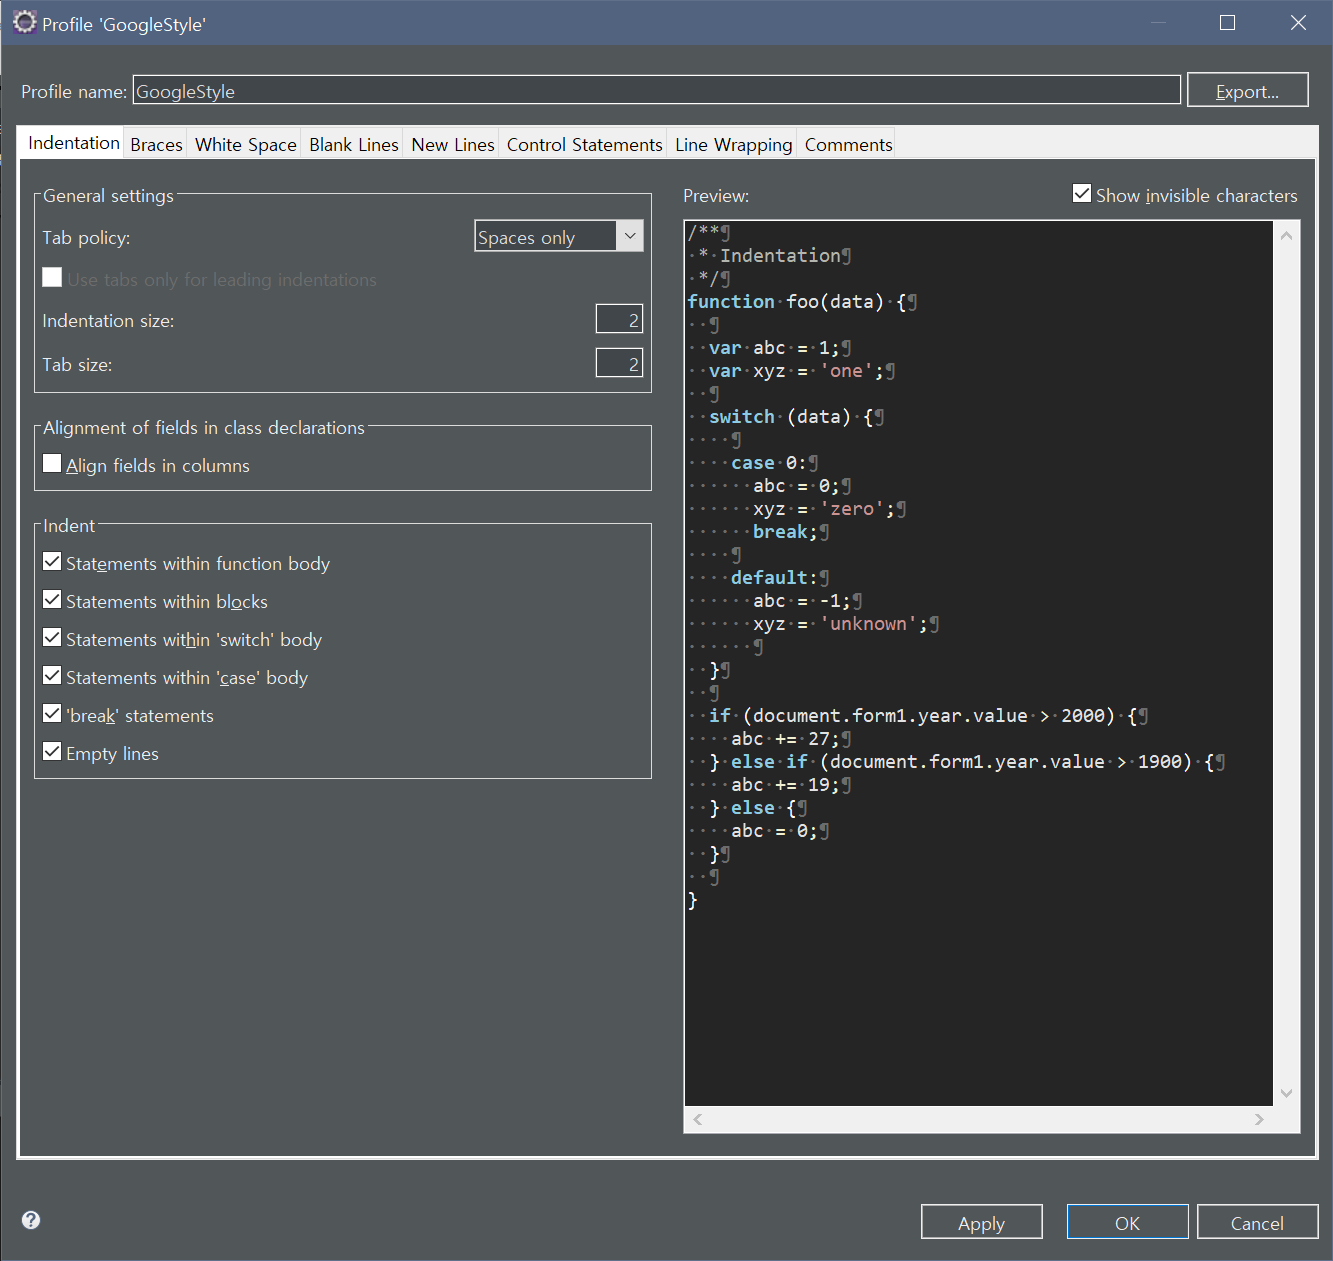
  4. Edit 창 열어서 다음과 같이 값 변경 후, 적용.
  5. JavaScript > Code Style > Formatter
  6. Import > eclipse-java-google-style.xml 선택.
  7. Edit 창 열어서 다음과 같이 설정 적용.

TEXT EDITOR 설정하기

  1. 이클립스 상단의 Windows > Preferences로 들어감.
  2. General > Editors > Text Editors 창 열기.
  3. Display tab width 2로 설정.
    • tab의 공백 사이즈가 2칸이라는 의미임.
  4. Show Print Margin 체크. Print Margin Column 값 80으로 설정.
    • 텍스트 에디터에 80자 가이드 라인을 보이게 하는 것임.
  5. Show Whitespace Characters 체크.
    • 공백 문자 표시
  6. Configure Visibility 설정 창에서 Carriage Return, Line Feed 체크 해제.
  7. Preference 창에서 indent 검색.
    • Web > CSS Files > Editor
      • Indent Using Spaces 체크
      • Indentation Size 2로 설정.
    • Web > HTML Files > Editor
      • Indent Using Spaces 체크
      • Indentation Size 2로 설정.
    • XML > XML Files > Editor
      • Indent Using Spaces 체크
      • Indentation Size 2로 설정.

확인

다 적용 후, Test.java 파일에서 ctrl + a, ctrl + shift + f -> 설정 한 대로 포메팅이 된 것을 확인할 수 있음.

728x90
반응형

'IDE' 카테고리의 다른 글

[Eclipse] 최적화 설정하기  (0) 2020.01.26
[Eclipse] eclipse.ini 파일 설정  (0) 2020.01.26
[Eclipse] 인코딩 설정  (0) 2020.01.26
[Eclipse] 테마 변경 (Windows)  (0) 2020.01.26
[Eclipse] 설치하기 (Windows)  (0) 2020.01.26

Eclipse Theme 설정

이클립스를 설치하고 실행하면 하얗고 밝은 화면을 볼 수 있음.
테마 변경으로 눈의 피로를 덜 받게 해서 조금이나마 시력 보호를 할 수 있음.
나는 moonrise라는 Eclipse 테마와 Dark Visual Studo라는 폰트 테마를 적용해서 사용하는걸 좋아함.
주의 할 점이 있는데 설정하다 꼬일 수 있으므로 workspace 백업 해두는 것을 권장함!!


Eclipse Thme 적용

  1. Help - Eclipse Marketplace 실행.
  2. moonrise를 검색하면 Color IDE Pack 이란게 뜸.
    예전엔 moonrise 테마만 따로 있었는데 패키지로 모아서 올렸나봄.
  3. Eclipse Moonrise UI Theme 만 선택해서 설치하도록 함.
  4. 동의 후, 설치. 이후 Eclipse 재시작을 함.
  5. Eclipse가 다시 시작 되면 Windows > Prefrence > General > Apperance 에서 Theme를 확인, 여러가지 버전의 Moonrise 테마가 있고, windows에 설치한다면 MoonRise (standalone)을 선택 하면 됨.
    이클립스 테마가 변경되는게 확인 되지만 이클립스를 한번 더 재시작 하라고 뜸.


Font Theme 설정

폰트 테마 역시 마켓 플레이스에서 받을 수 있지만, 나는 다음 링크의 테마가 마음에 들어서 이걸 다운받고 적용하기로 함.
LINK
이곳에 접속하면 다른 테마들도 많으니 골라서 설치 할 수도 있음.


Dark Visual Studio - Eclipse Color Themes


www.eclipsecolorthemes.org

  1. Eclipse Color Theme (EPF) 저장.
  2. Windows > Prefrence > General > Apperance > Colors and Fonts 창으로 들어감.
  3. 창 왼쪽 하단의 Import 선택, 방금 받은 파일을 지정후 finish, Eclipse 재시작.
  4. 적용된걸 확인할 수 있음.


728x90
반응형

'IDE' 카테고리의 다른 글

[Eclipse] 최적화 설정하기  (0) 2020.01.26
[Eclipse] eclipse.ini 파일 설정  (0) 2020.01.26
[Eclipse] 인코딩 설정  (0) 2020.01.26
[Eclipse] Code Style Formatter, Text Editor 설정하기  (0) 2020.01.26
[Eclipse] 설치하기 (Windows)  (0) 2020.01.26

Windows Eclipse 설치하기

설치

  1. 이클립스 설치 프로그램 다운로드.
  2. eclipse-inst-win64.exe 실행.
  3. Eclipse IDE for Enterprise Java Developers 선택.
  4. JVM과 설치 경로 지정
    • JVM 선택에서 JRE가 아닌 JDK 선택.
    • Installation Folder에서 적절한 경로 지정.
  5. 동의 할게 뜨면 동의 하고 설치 진행.
  6. 설치 완료 후, 실행.
  7. JAVA로 작업할 파일들이 저장될 경로 (Workspace) 지정.


설치 확인을 위한 테스트

  1. 새 프로젝트 생성.
    (ctrl + n) -> Java Project

  2. 프로젝트 이름 지정.

  3. finish.

  4. 테스트 프로젝트의 패키지 생성.
    (ctrl + n) -> package

  5. test로 패키지 이름 지정.

  6. Test.class 파일 생성.
    (ctrl + n) -> class

  7. public void main(String[] args) 체크 후 생성.

  8. 간단한 출력문 추가.

       System.out.println("HI");
  9. ctrl + f11으로 실행.

728x90
반응형

'IDE' 카테고리의 다른 글

[Eclipse] 최적화 설정하기  (0) 2020.01.26
[Eclipse] eclipse.ini 파일 설정  (0) 2020.01.26
[Eclipse] 인코딩 설정  (0) 2020.01.26
[Eclipse] Code Style Formatter, Text Editor 설정하기  (0) 2020.01.26
[Eclipse] 테마 변경 (Windows)  (0) 2020.01.26

+ Recent posts